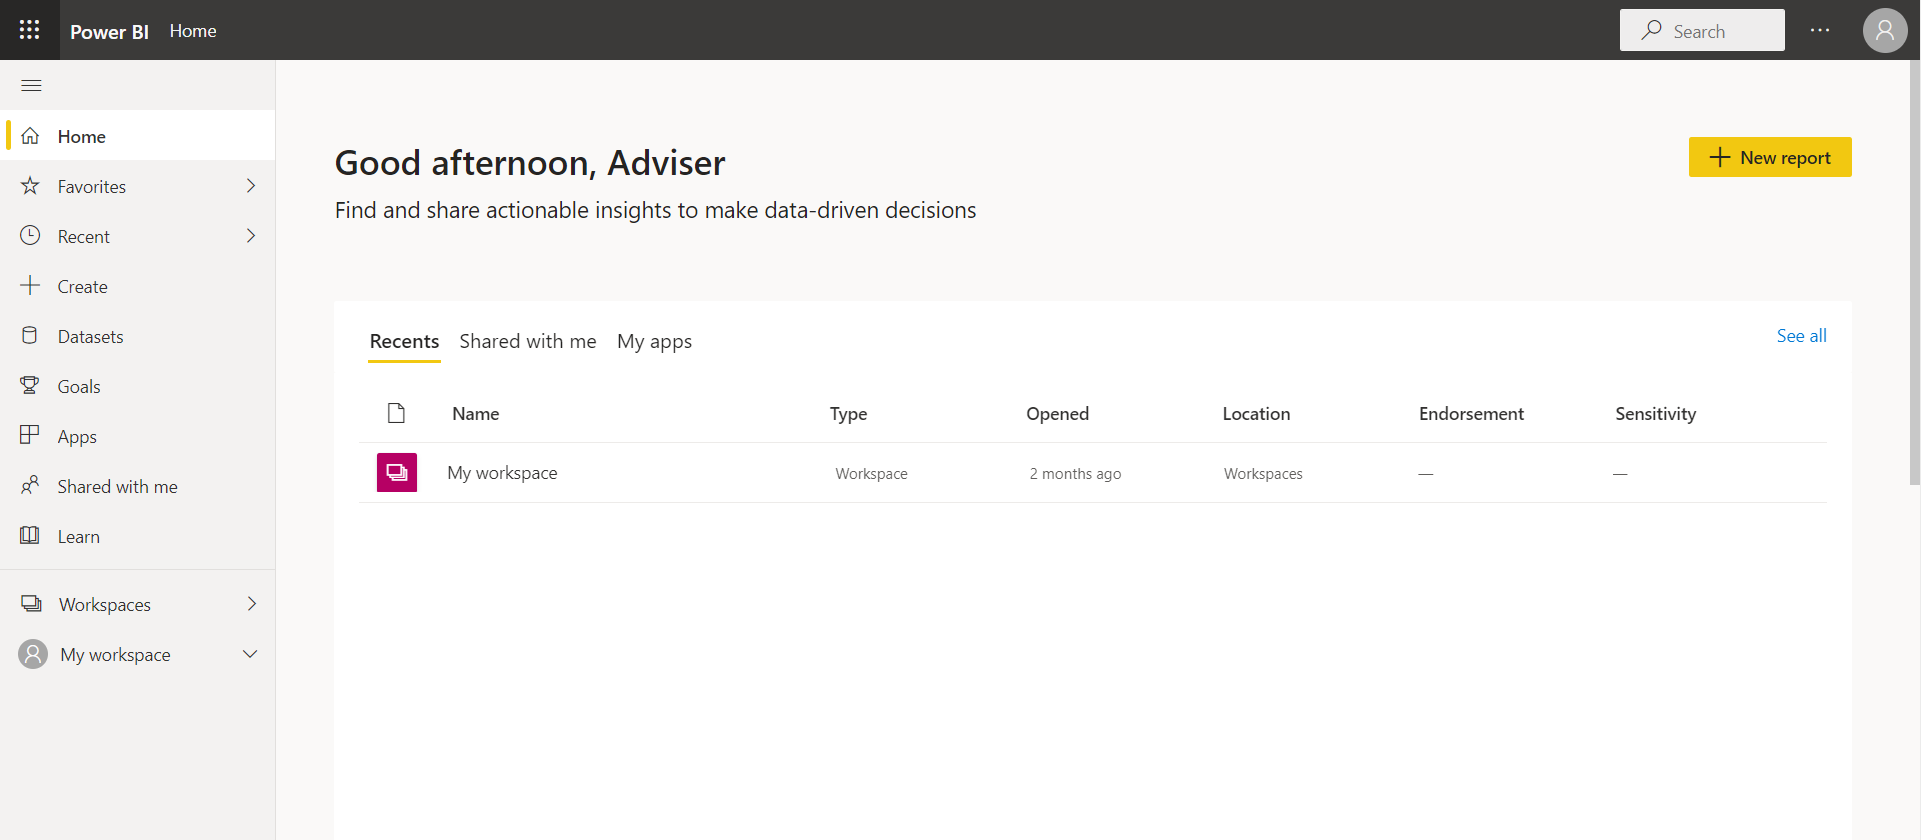
SmartrInsights delivers you powerful reporting and the ability to analyse your firm's data via Microsoft PowerBI.
This article is intended for users who have requested access to SmartrInsights, whom have been onboarded to the feature and been sent an invite email and an email with the PBIX and PBIT files.
If have not been onboarded and you would like access to this feature, speak with your Customer Success Manager.
Getting Started
First things first, you will need to decide which of these two options is best for you:
- PowerBI online. Available on the web, for free, no download required.
- Pro: As its online, any device can access. Simple to use. Easy to view reports and click on dashboards.
- Con: Cannot be used to create custom reporting.
- Which file to use: Use the PBIX file, if you choose this option.
- If you choose this option, click here to open the Microsoft website and sign in/up.
- PowerBI desktop application. Available to download, for free, from the Microsoft App Store.
- Pro: With this app you can create custom reports.
- Con: Doesn't play nice with non-Windows laptops. Not as easy-to-use as the online version.
- Which file to use: Can use either the PBIX or PBIT file types with this option.
- If you choose this option, download and install the PowerBI desktop tool from your App Store.
This is super high level, if you want to delve into more detail, check out this article from Microsoft, which is part of a larger free course of information you might find helpful.
In the next sections we will go through the steps of how to use the files we have sent you for each of the options we outlined above.
Using PowerBI online
Once you sign up/into PowerBI online, your screen should look similar to below:
For PowerBI online, you will need to use the file with the extension type ' pbix '.
PBIX files contain both the report templates and the underlying data prepopulated into the report. They are already configured to point to your data source. Because of this, these files types can be useful to share data and reporting intra-company.
However, for GDPR and Data Protection reasons, the file we have sent you will not contain data.
Below are the steps to follow to import the pbix file and sync it up to your data:
1. Save the pbix file attached in the email to a location on your device.
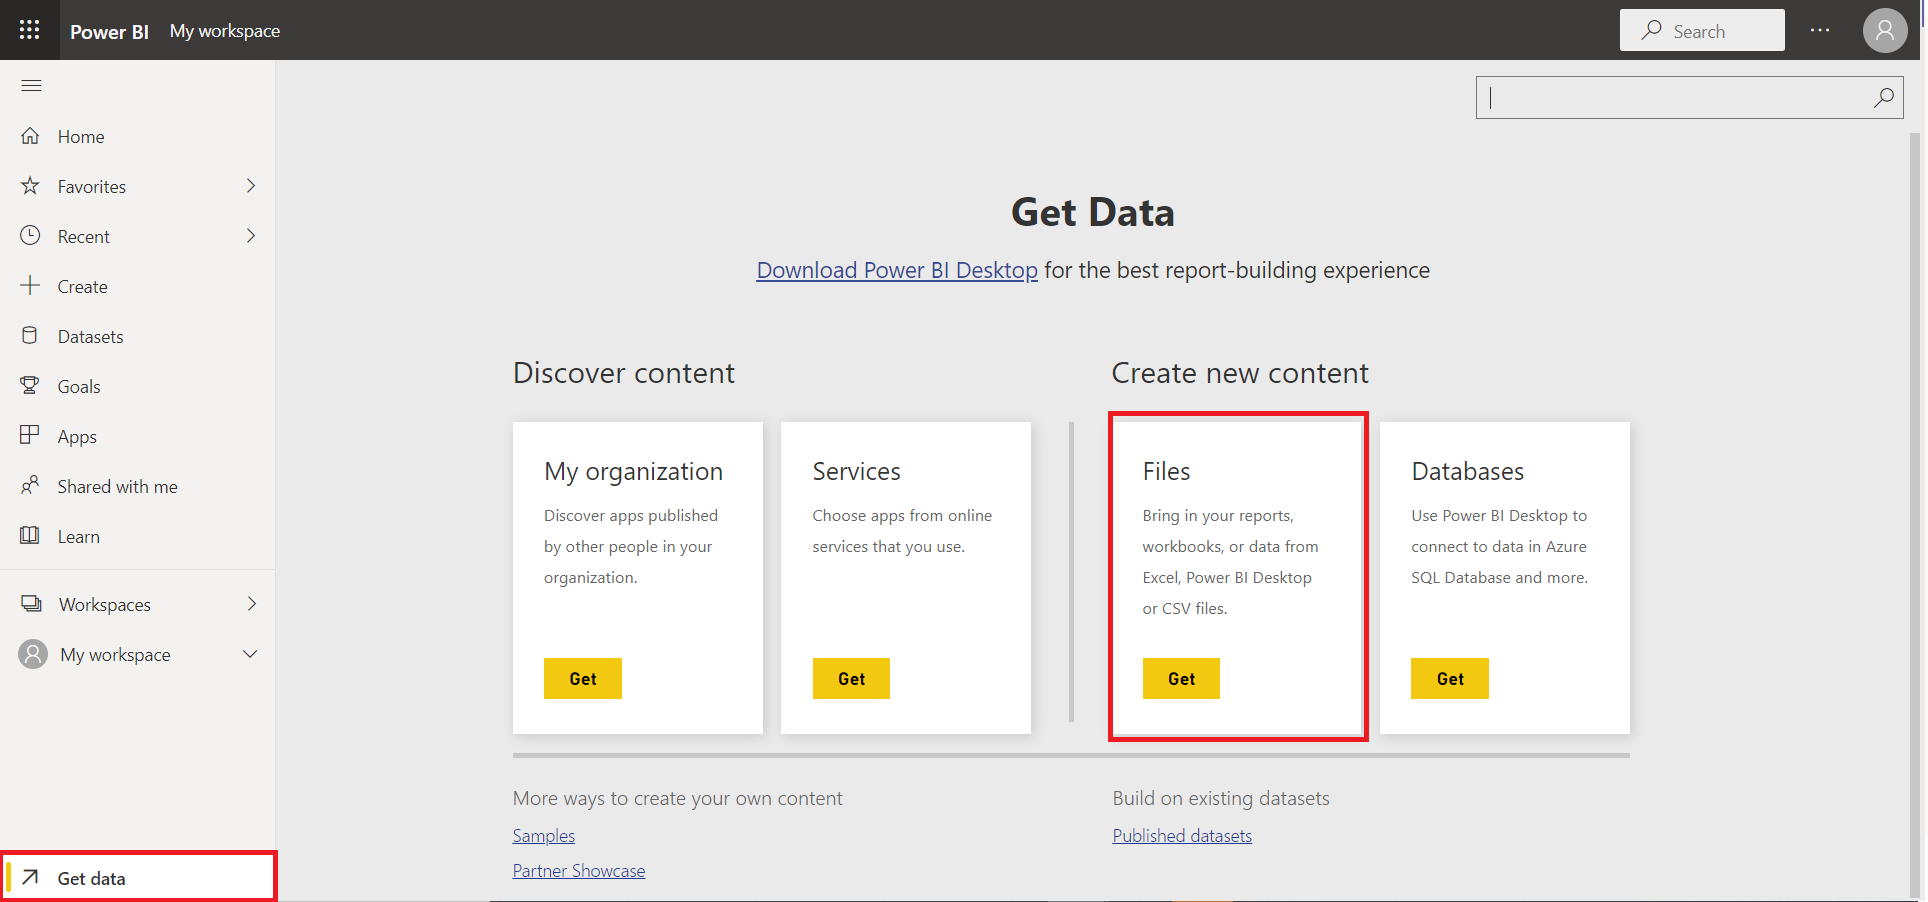
2. Click on Get Data from the bottom left corner, then Get under the Files options.
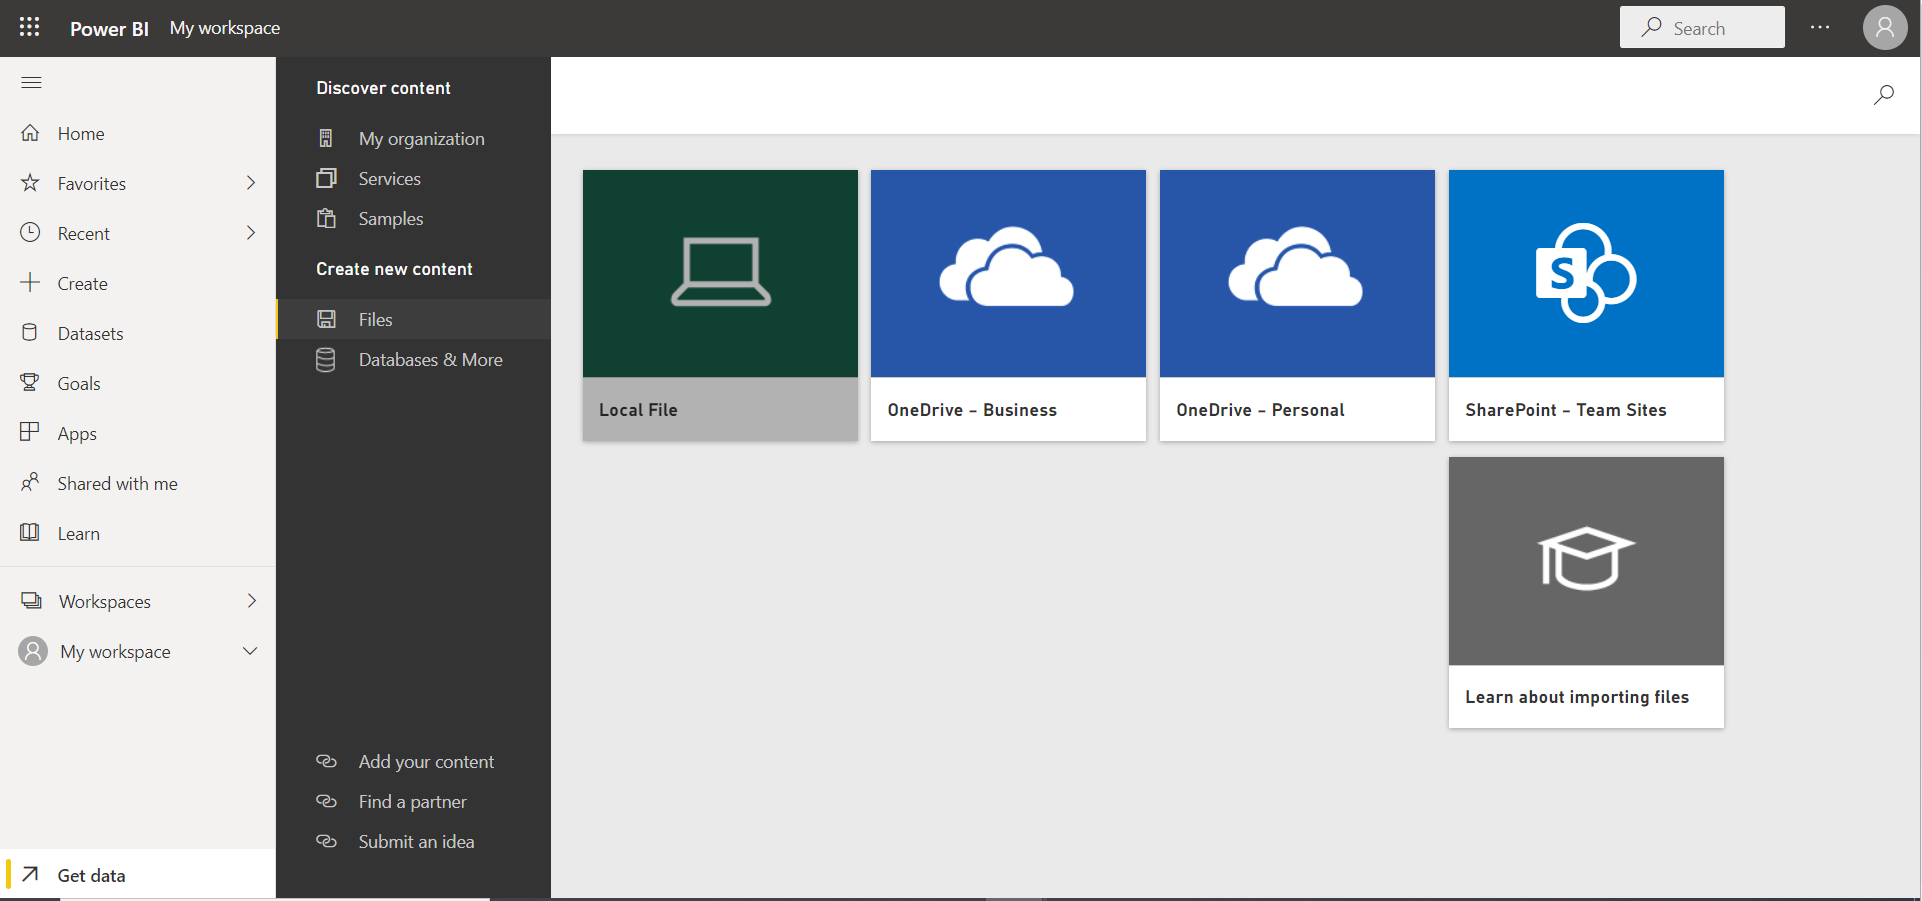
3. Select Local File, then choose the pbix from the folder you saved the file to in step 1.
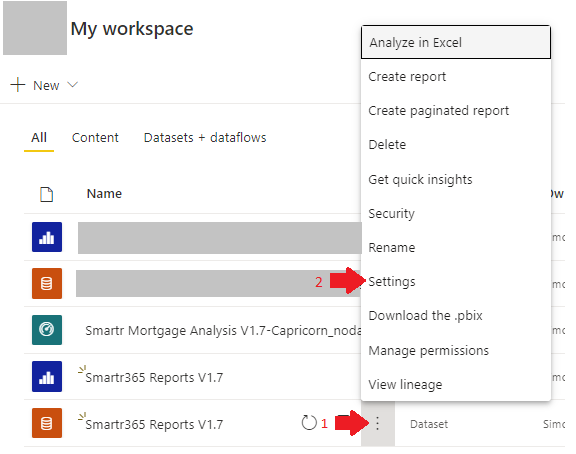
4. Next we need to hook up the report to include the underlying data. Navigate to your workspace in the left hand pane. You may notice the your report appears 3 times in your workspace. One with a blue icon next to it, one with an orange icon and a third with a blue-green icon.
The blue icon refers to the actual report can view and will mostly be interacting with.
The file with the orange icon refers to the actual data which is loaded into the report.
5. Right now we are interested in the dataset. So hover your mouse over the three dots to the right of the name with the orange icon (the dataset), click to bring up the context menu, and then select settings.
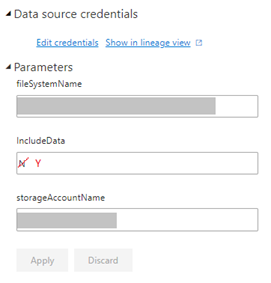
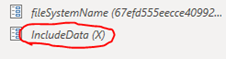
6. Scroll down and open the Parameters section. Here you should see your FileSystemName and StorageAccountName already entered. (FYI these are are sent in your email).
We want to set IncludeData to Y click in that text box and replace the N with a Y. Click Apply.
7. You will likely see a message that you need to update your credentials, click on Edit Credentials.

8. The server and path will be specific to your organisation. Select OAuth2 and pick the right privacy level for your data (this is your choice).
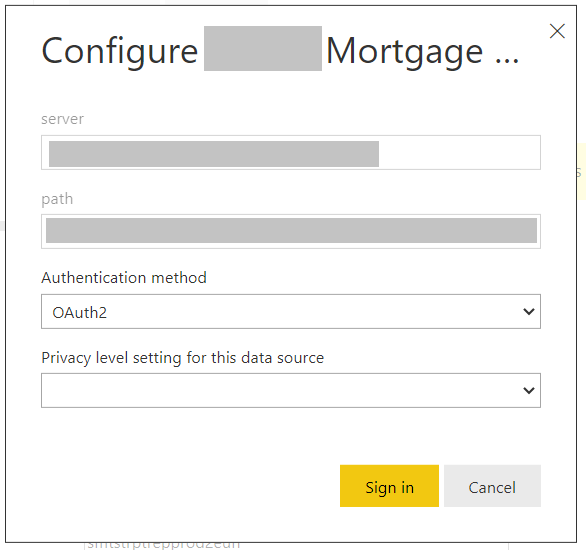
9. Clicking Sign in will open up a dialogue where you can enter your email and password. Note that you must use the same email as the one you were invited have access on. This is to ensure only users who should have access to your brokerages data, can access it.
10. Go back to your workspace and hover the mouse cursor once again over the dataset (orange icon) and click the refresh icon.
If you have entered the correct credentials and set IncludeData to Y then your report data should now be refreshing.
You can confirm this by trying to click the refresh icon again. If it is working then you should see a prompt which says ‘Refresh in Progress’. This could take several minutes depending on how much data is contained in your datalake. You should also see a little animating refresh icon circling, shown here.

11. Once the refresh has completed navigate back to your workspace, open your report (blue icon) which should open and contain your data.

12. Now its time to play around and get used to how the reports work.
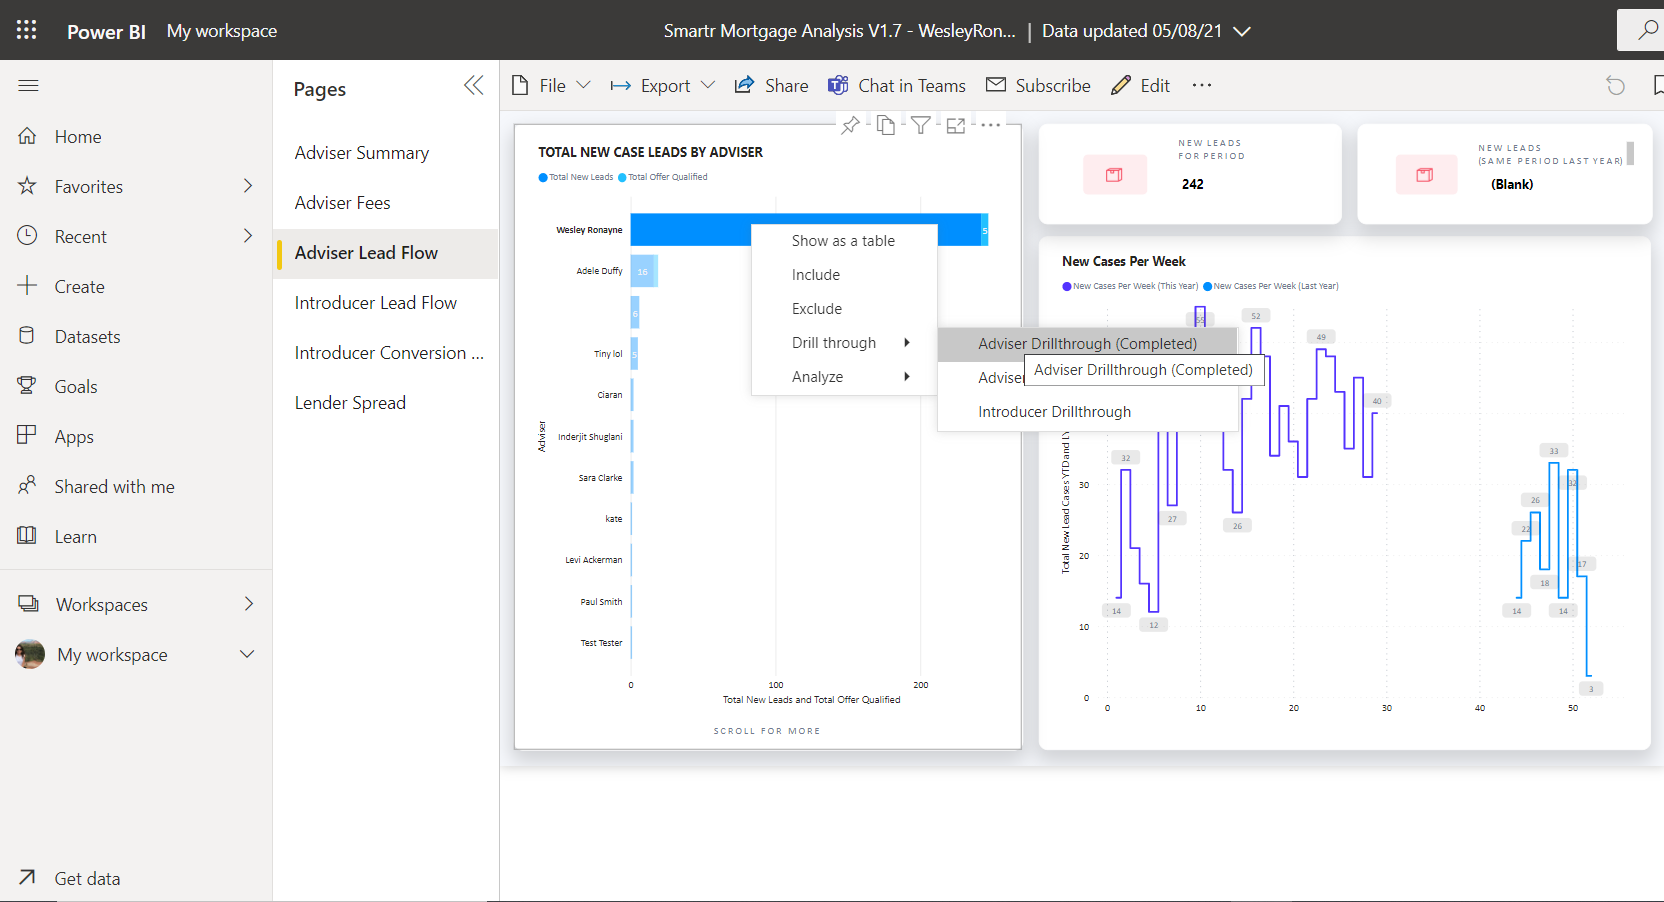
Click on the reports in the Pages list to open the different dashboards Smartr365 has created.
Try clicking on an adviser name, watch how the reports update to show only the data pertinent to that adviser. Click on the name again and the report adjusts to show all.
Try right clicking on the adviser name, and select one of the drilldown options, this gives you more data about the individual cases making up that total.
These reports are meant to be interactive, so get in and click around.
13. The updated data is available on the hour every hour from Smartr365. Which means the max lag time is one hour. However you must click refresh to pull the latest data. We have a separate FAQ describing how to set up automatic refreshes.
Using Power BI Desktop
When you are using the PowerBI desktop version, you can use either the 'pbit' type file or the 'bpix' type file.
Opening a PBIX file on PowerBI desktop
PBIX files contain both the report templates and the underlying data prepopulated into the report. They are already configured to point to your data source. Because of this, these files types can be useful to share data and reporting intra-company.
However, for GDPR and Data Protection reasons, the file we have sent you will not contain data.
Below are the steps to follow to import the pbix file into PowerBI desktop and sync it up to your data:
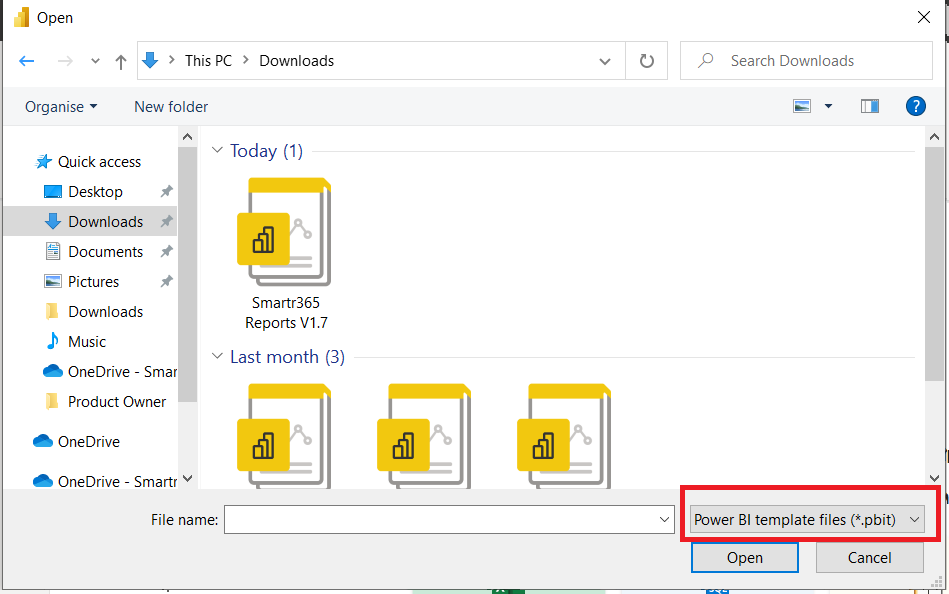
1. Open up PowerBI desktop application on your device. Download the pbit file from your email.
2. Open PowerBI Desktop application, click File, then Browse reports and select the pbit file you downloaded.
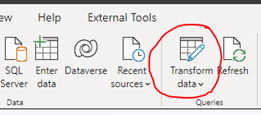
3. Next we need to hook up the data to the report. Click on the Transform data icon
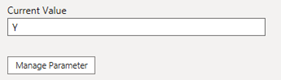
Click on IncludeData (on the bottom left of the screen).

Then set the Current Value to Y.
And finally click Close & Apply on the top left. You will be returned to PowerBI Desktop and your most recent data will be downloaded. Now save your report to somewhere safe and you are good to go.
5. Update the data shown in your report data by manually by clicking the Refresh button in the ribbon at the top of the screen.
Updated data is available on the hour every hour from Smartr365. Which means the max lag time is one hour. However you must click refresh to pull the latest data. We have a separate FAQ describing how to set up automatic refreshes.

6. Now its time to get used to the reports and dashboards that Smartr365 has already created for you. Click on the tabs at the bottom to open the different reports.
Click on a adviser or introducer name to filter the report.
Right click on the adviser name and select drilldown to get the detailed view of the data underlying the summarized number.
Opening a PBIT file on PowerBI desktop
A 'pbit' file contains only the report structure and has not been configured to any particular data set.
In other words, all brokerages could be sent the same pbit file and there would be no data concern as it is not hooked up to any data. So if you open this file type then you will need to configure the data source.
1. Save the pbit file to a location on your device.
2. Open PowerBI Desktop application, click File, then Browse reports and select the pbit file you downloaded. You may need to change the file type to pbit as it defaults to pbix.
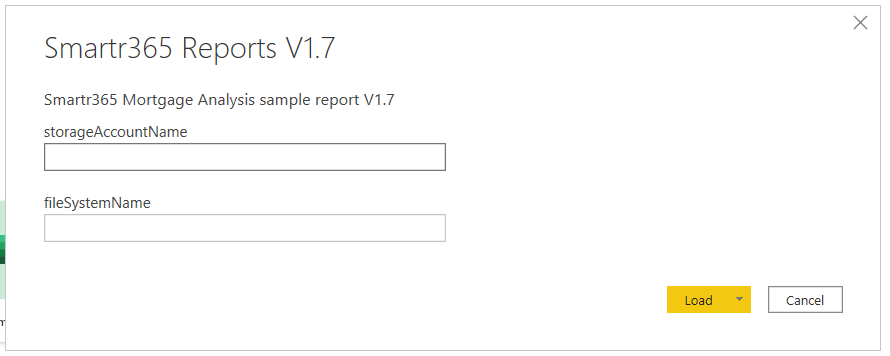
3. Next a popup will show, asking you to enter in your storageAccountName and fileSystemName. These were sent to you in the email.
4. Click Refresh and enter in your credentials.
Check out our other FAQ guides such as how to create a custom report on SmartrInsights here.
Comments
Please sign in to leave a comment.